My First OpenStack Instance on DreamCompute
DreamHost has been active in the OpenStack arena for some time, and now they have added it to their hosted offerings (still in beta) under the name DreamCompute. I was lucky enough to be included in their beta period (request an invitation here) and am excited to see what they have to offer.
Once I punched in my beta code, I was sent a set of credentials to use (they differ from my existing DreamHost ones) and a link to the quickstart and their DreamCompute wiki section. I had trouble determining exactly what they have running, but it seems like it might be the Havana release running without Heat. Beyond that inexplicable difference from stock OpenStack, it looks like they just skinned Horizon and let it loose (I’m sure it wasn’t that simple).
What do you get?
First and foremost, DreamCompute account gives you your own Openstack Tenant. This means you get total control over your network, access to your instances, and how your resources are allotted.
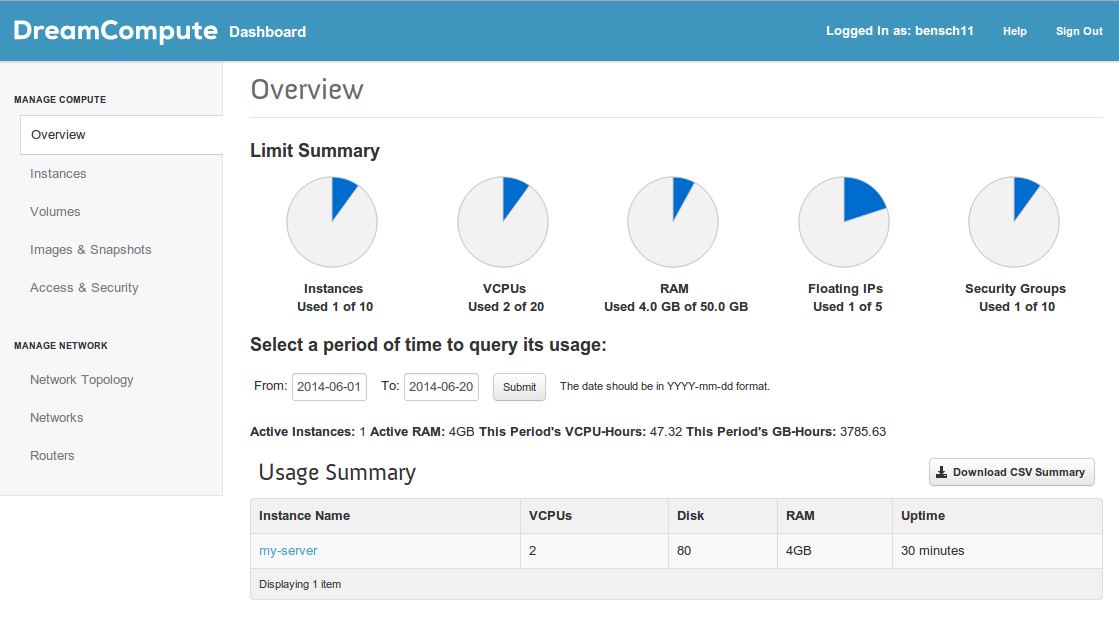
Speaking of resources, the folks at DreamHost have been pretty generous: I got up to 10 instances, 50 gigs of ram, 20 CPUs, a terrabyte of disk, and 5 floating IPs. Not too shabby for a free beta!

Quickstart
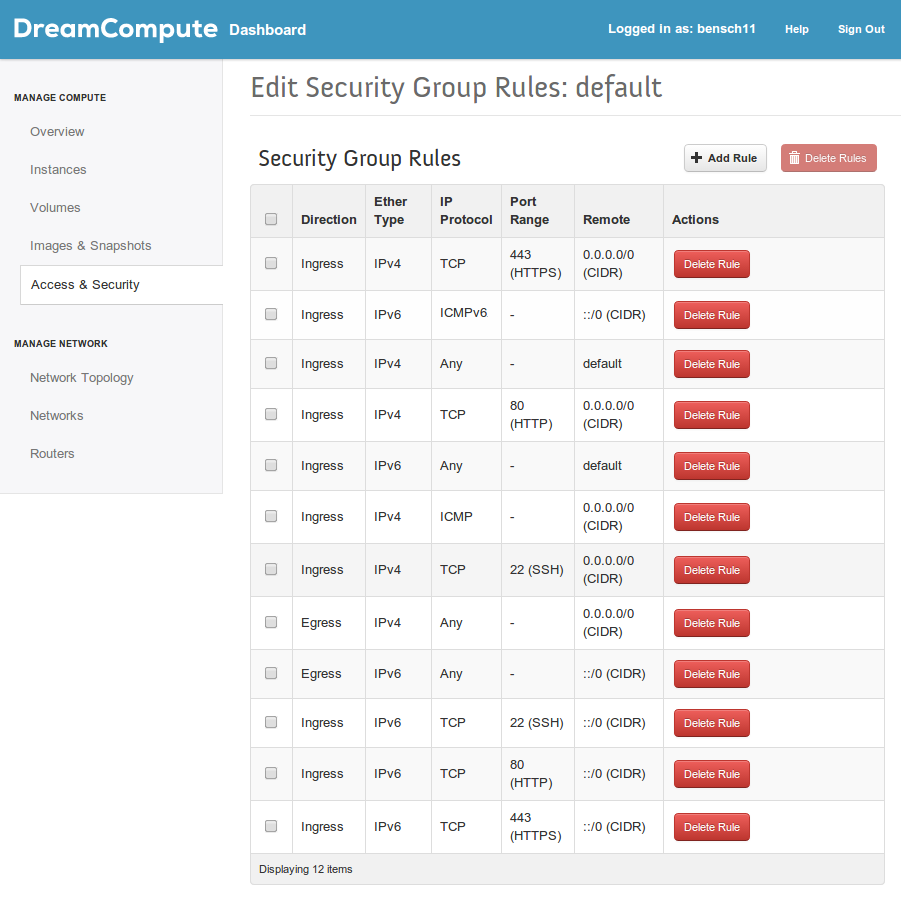
Once you’ve reset your password, you are directed by the welcome email to the quickstart. The first thing you’ll have to do is wire up your network and put in place a security group to use when creating an instance. The quickstart feature will do this for you: create an IPv4 and IPv6 network, a security group permitting ssh, http, and https, and an initial floating IP to use.
default group settings
CLI
Now that your network is nicely configured, lets test out the API from the command line.
The first step is to download your Openstack RC File. Navigate to Access & Security from the left menu, then select the API Access tab. Now you can Download Openstack RC File.
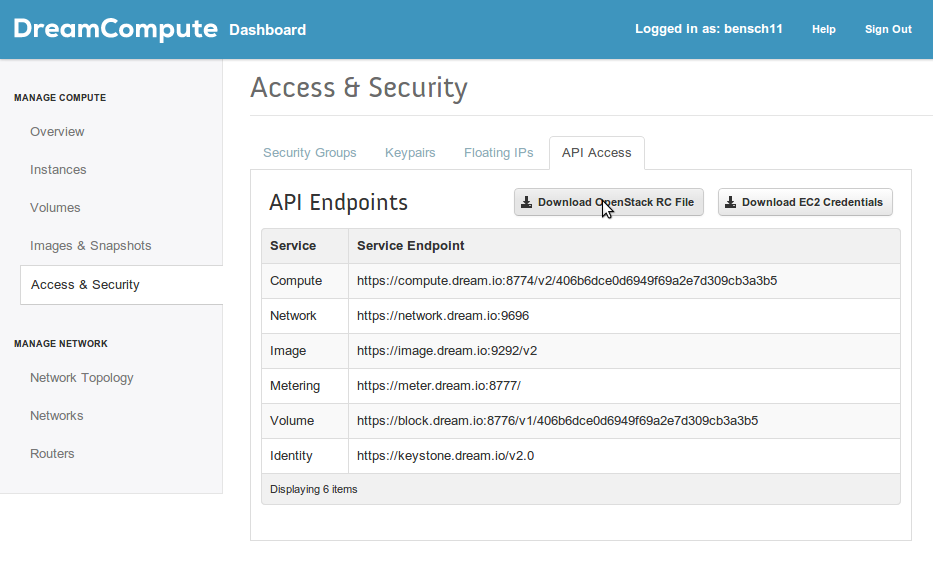
In a terminal, source this file (source ~/Downloads/dhc447391-openrc.sh) and punch in your DreamCompute password. Now you can use the Nova (compute management) / Neutron (network management) cli clients to control your tenant.
Oh right, you need the OpenStack command-line clients too.
My First Instance
SSH Key
When we build out instance, we want to install an ssh key so that we can shell in. You can do this in the DreamCompute dashboard, but it’s cooler to do it in the command line:
nova keypair-add --pub_key ~/.ssh/id_rsa.pub ben
This installs the pub key key I use everywhere else as a resource in OpenStack which I can reference when building a VM. You can of course, source this pub key from anywhere.
Launch The Instance
$ nova boot --poll --flavor lightspeed --image Ubuntu-14.04-Trusty --key-name ben my-server
+--------------------------------------+------------------------------------------------------------+
| Property                             | Value                                                      |
+--------------------------------------+------------------------------------------------------------+
| OS-DCF:diskConfig                    | MANUAL                                                     |
| OS-EXT-AZ:availability_zone          | nova                                                       |
| OS-EXT-STS:power_state               | 0                                                          |
| OS-EXT-STS:task_state                | scheduling                                                 |
| OS-EXT-STS:vm_state                  | building                                                   |
| OS-SRV-USG:launched_at               | -                                                          |
| OS-SRV-USG:terminated_at             | -                                                          |
| accessIPv4                           |                                                            |
| accessIPv6                           |                                                            |
| adminPass                            | sZK4wMuDK5NS                                               |
| config_drive                         |                                                            |
| created                              | 2014-06-20T19:09:42Z                                       |
| flavor                               | lightspeed (300)                                           |
| hostId                               |                                                            |
| id                                   | 732bf252-c48e-4462-b389-51b1885081ad                       |
| image                                | Ubuntu-14.04-Trusty (8363ff61-55a8-4d4f-9867-fb913e4e5e49) |
| key_name                             | ben                                                        |
| metadata                             | {}                                                         |
| name                                 | my-server                                                  |
| os-extended-volumes:volumes_attached | []                                                         |
| progress                             | 0                                                          |
| security_groups                      | default                                                    |
| status                               | BUILD                                                      |
| tenant_id                            | 406b6dce0d6949f69a2e7d309cb3a3b5                           |
| updated                              | 2014-06-20T19:09:42Z                                       |
| user_id                              | 4b5ae78857604bf79b3e10ca6798b761                           |
+--------------------------------------+------------------------------------------------------------+
Server building... 100% complete
Finished
This generates us an instance with our ssh key installed to the default user: dhc-user. DreamCompute uses it’s own sassy sizing flavors (similar to Amazon’s “t1.micro” etc.). I’ve selected “lightspeed”, which equates to 4 GB RAM, 2 CPUs, and 80 GB of disk.
We can’t get into our VM quite yet however; we still need to give it a Floating IP in order to shell in.
Assigning a Floating IP
In order to access our instance from outside of the private network, we must give it a Floating IP. We are allowed 5 of these, but they aren’t yet allocated to us. So let’s first allocate one in our tenant. Then we can associate it to our instance.
Allocate Floating IP
$ nova floating-ip-pool-list
+------------+
| name       |
+------------+
| public-110 |
+------------+
My tenant has access to one pool, public-110, which is where I will create my floating ip from:
$ neutron floatingip-create public-110
Created a new floatingip:
+---------------------+--------------------------------------+
| Field               | Value                                |
+---------------------+--------------------------------------+
| fixed_ip_address    |                                      |
| floating_ip_address | 173.236.249.21                       |
| floating_network_id | b576a0f4-a0fc-4a1a-bea3-9e18bd663b64 |
| id                  | d8379f80-fae1-4881-8c57-60588c84c24f |
| port_id             |                                      |
| router_id           |                                      |
| tenant_id           | 406b6dce0d6949f69a2e7d309cb3a3b5     |
+---------------------+--------------------------------------+
Associate Floating IP
For this step, we need to wire up a bunch of things, but what we eventually want, is to run neutron floatingip-associate --fixed-ip-address <Private_IPv4_Address> <Floating_IP_ID> <Port_ID> in order to configure all the wiring.
Private_IPv4_Address: the private IP from the new instance
$ nova list
+--------------------------------------+-----------+--------+------------+-------------+---------------------------------------------------------------------+
| ID                                   | Name      | Status | Task State | Power State | Networks                                                            |
+--------------------------------------+-----------+--------+------------+-------------+---------------------------------------------------------------------+
| 732bf252-c48e-4462-b389-51b1885081ad | my-server | ACTIVE | -          | Running     | private-network=2607:f298:6050:c090:f816:3eff:fe8c:7f20, 10.10.10.6 |
+--------------------------------------+-----------+--------+------------+-------------+---------------------------------------------------------------------+
Floating_IP_ID: the neutron ID for our new floating IP
$ neutron floatingip-list
+--------------------------------------+------------------+---------------------+---------+
| id                                   | fixed_ip_address | floating_ip_address | port_id |
+--------------------------------------+------------------+---------------------+---------+
| d8379f80-fae1-4881-8c57-60588c84c24f |                  | 173.236.249.21      |         |
+--------------------------------------+------------------+---------------------+---------+
Port_ID: the neutron ID for our instance’s port
$ neutron port-list
+--------------------------------------+------+-------------------+----------------------------------------------------------------------------------------------------------------+
| id                                   | name | mac_address       | fixed_ips                                                                                                      |
+--------------------------------------+------+-------------------+----------------------------------------------------------------------------------------------------------------+
| 27b4bc18-ee46-4336-af9a-7b818e84d8e9 |      | fa:16:3e:fb:22:1b | {"subnet_id": "3ffd7206-ab29-4433-a618-784e391fc557", "ip_address": "10.10.10.1"}                              |
|                                      |      |                   | {"subnet_id": "12bc5832-9455-40eb-8e0d-116cad5b59d3", "ip_address": "2607:f298:6050:c090::1"}                  |
| fb28ea48-f4e7-40b6-bbad-490ef91ca1fc |      | fa:16:3e:8c:7f:20 | {"subnet_id": "3ffd7206-ab29-4433-a618-784e391fc557", "ip_address": "10.10.10.6"}                              |
|                                      |      |                   | {"subnet_id": "12bc5832-9455-40eb-8e0d-116cad5b59d3", "ip_address": "2607:f298:6050:c090:f816:3eff:fe8c:7f20"} |
+--------------------------------------+------+-------------------+----------------------------------------------------------------------------------------------------------------+
Now that we’ve collected everything we need, we can put it together to wire in our floating ip:
$ neutron floatingip-associate --fixed-ip-address 10.10.10.6 d8379f80-fae1-4881-8c57-60588c84c24f fb28ea48-f4e7-40b6-bbad-490ef91ca1fc
Associated floatingip d8379f80-fae1-4881-8c57-60588c84c24f
Try out the Instance
$ ssh dhc-user@173.236.249.21
The authenticity of host '173.236.249.21 (173.236.249.21)' can't be established.
ECDSA key fingerprint is a3:5f:f8:4a:bb:2f:51:5f:ee:92:01:4f:39:e4:b8:34.
Are you sure you want to continue connecting (yes/no)? yes
Warning: Permanently added '173.236.249.21' (ECDSA) to the list of known hosts.
Welcome to Ubuntu 14.04 LTS (GNU/Linux 3.13.0-24-generic x86_64)

 * Documentation:  https://help.ubuntu.com/

The programs included with the Ubuntu system are free software;
the exact distribution terms for each program are described in the
individual files in /usr/share/doc/*/copyright.

Ubuntu comes with ABSOLUTELY NO WARRANTY, to the extent permitted by
applicable law.

dhc-user@my-server:~$
Wrapping up
Although I’m a little disappointed at the lack of heat support, DreamCompute is a very slick and turn-key IaaS solution using OpenStack.
I hope they stay in beta forever so i can keep my free sandbox!
comments powered by Disqus